An Elizabethan Hoop Skirt
- Noelle

- May 2, 2019
- 4 min read
OOF, it's been a little while. The last couple of weeks have been hectic, and I had to put the Magic Shop Project on pause to work on a commission for an Elizabethan hoop skirt, which is what this post will be about! A friend of mine (Stacey) is BIG into Ren Fair (as in, she's the Queen Elizabeth actress on cast for two different fairs on the east coast), and she's done tons of costumes for herself and friends. She reached out to me about this commission for a friend she didn't have time for, for which I am so grateful! I have made a couple hoop skirts in the past, but it's been several years and I was glad to have a chance to see how my skills have improved. Along the way Stacey was extremely helpful providing tips, and I learned a lot through this process!
Materials:
- Medium/heavy weight cotton, 1 yard at 108" width
- Medium weight black cotton, 3 yards
- Cream grosgrain ribbon, 7/8"
- 2 rectangular rings
- Hoop steel
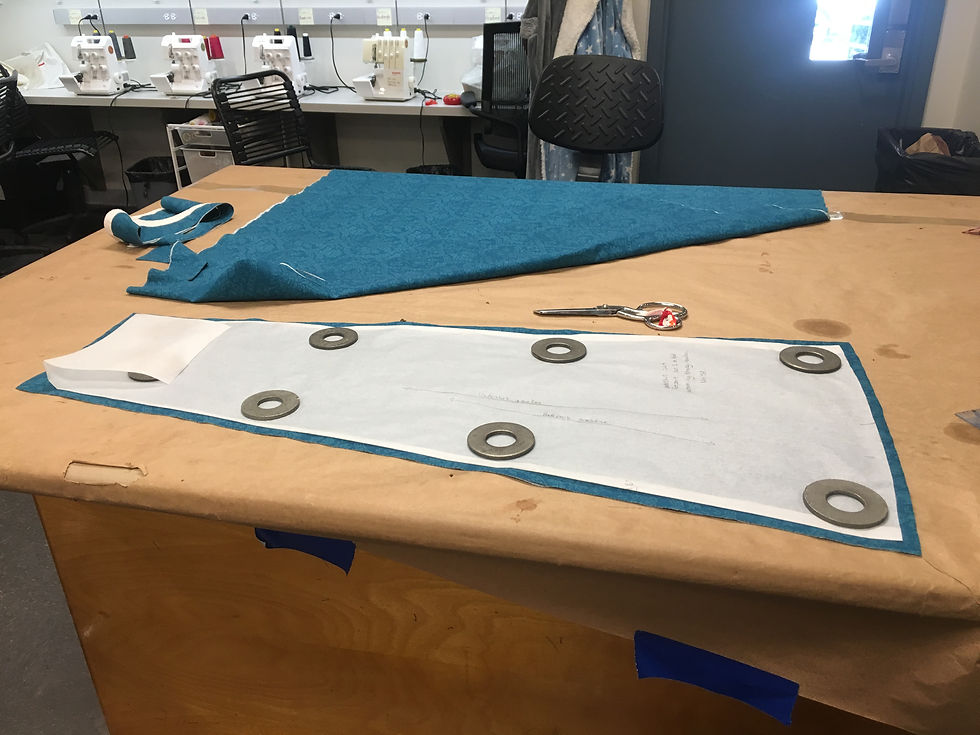
After getting the client's measurements I started work on the pattern. The client has a 32" waist and requested a 95" circumference at the bottom. Based on their height, the skirt needed to be 35" from waist to ankle. I drafted a panel for a 6-panel skirt, where the bottom edge was 16" (for a total circumference of 96 inches, for easy math purposes). The top edge was 8", to be pleated down to size later.
After pre-washing and ironing the cotton for the skirt, I began cutting the pattern with a 1/2" seam allowance.
Then I serged all the edges of each panel to prevent fraying.
Stacey explained to me that the hoop skirt would tie around the waist, with ribbon passing through rectangular rings to be looped around and tightened at the front. For ease of looping the ribbon, it's better to have the rings towards the front as opposed to exactly at the sides of the body. As such, she recommended sewing together 2 front panels, and the other 4 panels for the back. Then, when attaching the back to the front, leave a 12" slit between the edges on each side so the skirt is easy to pull on and off.

And from the right side of the fabric:

I pressed and top stitched each seam open.
Next I took care of the hem. Another tip Stacey imparted to me: sew the rolled hem to the outside, instead of the inside as is normally done, because it will be covered by a trim and it will help prevent sticks and other debris from catching on the hem while walking outside. All my costuming experience has been for indoor events, so I never would have thought of this problem!


Next up: the boning channels. I marked out the channels in erasable pen on the back of the fabric. There were 6 channels in total. The bottom three were quite close together towards the bottom of the skirt, as that's where most of the weight will be, with the other three increasingly far apart as you move up. The top hoop sat at easy reach for the hands, around mid thigh level, so it would be easy to pick up the skirts when walking os sitting. I used cream grosgrain ribbon at 7/8" for the channels. At the center of the back section I left a 4" gap, where the hoops would overlap and could be wrapped together with tape.

And from the back:

Next came pleating the waist down to size. I needed to get the total waist measurement around the top to be a bit less than 30". I made a couple 3/4" knife pleats to each panel to bring the total waist measurement to 29".

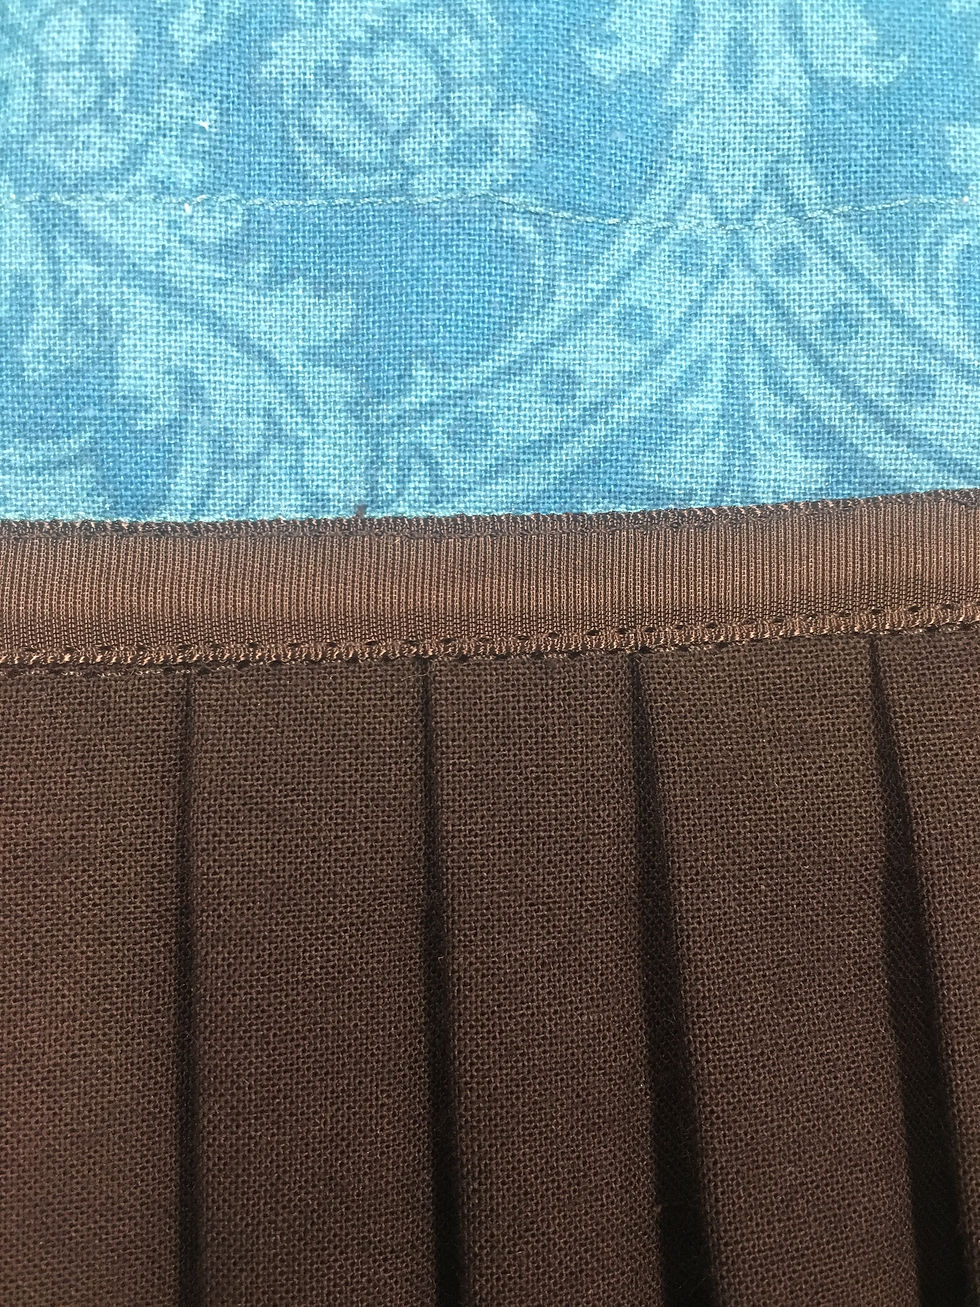
At this point it felt like the home stretch, but not so! Now it was time for the trim at the bottom. I've always been a big fan of gathers and ruffles, but I wanted to try something new. And so, I used knife pleats. I have made a box pleat skirt in the past, but it was a while ago. Pleating is such a beautiful technique, so I hope I can practice it more often.
I started by cutting my black cotton fabric into 4 VERY long 8" strips. I wanted the pleats to be 4" wide, and to avoid the torture of hemming nearly 20 feet of fabric (while also coming out with a smoother finish), I decided it would be easiest to simply double the width and fold the fabric in half. I sewed all the strips together at the ends, the ironed the entire super long strip in half. Then came the pleating.


I freehanded 1/2" pleats and pinned each one in place. Then I attached it directly to the bottom edge of the skirt, just under the second line of boning channel. Once attached, I took 1/2" black grosgrain ribbon and stitched it down over the raw edge of the pleating.
At last it was time for the finishing touches! I used the same cream grosgrain ribbon for the waistband. I cut a length just a bit longer than the top edge of the front section, and another just a bit longer than the back section. I stitched them on to the wrong side of the skirt, leaving some overhang on both sides (to be folded over for neat edges).

For the back section I cut another length of ribbon, just longer than the top edge, and stitched it to the ribbon already in place along the top edge, then again along the bottom edge so it was attached to the skirt. Before stitching over the ends, I slipped on a rectangular ring to each end, then folded the ribbon over and stitched the ends down on the wrong side of the skirt.


For the front panel I cut a much longer piece of ribbon, since it would be passed through the ring then looped back to the front and tied in a bow. I stitched the ribbons together in the front just as in the back.
At last, it was nearly done! Final step was adding the boning. Stacey actually cut the boning for me (I measured each channel and added a few inches for overlap), then we stuck them in and wrapped them together in the back. And finally, the results:


I'm so thrilled with how this turned out, and I hope I can make another one again soon! Next time I'll come with a Magic Shop Project update~
Comments